This is a complete step by step guide on how to start a mommy blog so you can work from home and raise your kids the right way. I’m sure most of the moms spend their time reading blogs or Facebook to take better care of the little one when is asleep.
And by doing a bit of research you want to join this community of moms by sharing your experiences with the world. When you start a mommy blog this can be one of the best decisions you ever made. Also, mommy blogging can be very lucrative for your self and your growing family. That’s why I can’t blame you if you wanna start a mommy blogger.
For sure you need to do a bit of hard work till your blog gets a bit of authority, but you can always take care of your babies when you are at home. You don’t need to be stressed about going back to working or hiring a babysitter to take care of your kids.
Firstly, it is not that hard to start a mommy blog, and I can explain to you step by step on how to start a mommy blog under 10-15 minutes.

1. How to Start a Mommy Blog? – By Planning
Before starting a mommy blog you need to be passionate about it. You need to enjoy writing and helping other new moms. There are a ton of topics that you can write about, like your career, while you travel and share experiences with your readers, how it is going with your parenting. I know can be a bit confusing at the start and you always wonder how to start blogging and on which topics.
You need to know your audience and always interact with them and responding to their questions. This way you build trust with them so they will always come back on your blog.
2. Domain & Hosting
This website uses a script WordPress.org and there are other blogging platforms are free like blogspot.com or weebly.com I do not recommend them, your blog may look something like mommyblog.weebly.com and this is harder to build trust with your readers. For running a WordPress.org you need a domain name and hosting. A lot of websites online use WordPress, it is extremely easy to use and you have a lot of options to choose like Plugins, Themes that will make your blog looking good.
Firstly, you need to know a name for your mommy blogger. This is when creativity comes in. I recommend being short or easily remembered, that’s why can be easier for your visitors to find you. I also recommend having .com because builds more trust with the readers. And I will show you all the steps you need to make to take the blog. Things that can help you put a name together: kids, chaos, love, life, mommy, mom, babies. These are some examples.
A domain name could cost you up to $14.99 per year, and hosting can host up to $10 per month.
But don’t worry I have a special deal for all the mamas out there.
You want to have a fast loading website that can load under 1-2 seconds, and you want to have a reliable hosting that has 24/7 customer support available. Having a hosting that loads more than 3 seconds usually all the visitors leave, there has been even a study done on this. That’s why I recommend fast and reliable hosting. This is where BlueHost comes to help my readers with a special deal.
For just $2.95 per month, you will get a FREE Domain name, free SSL certificate (protecting your visitors’ data), extra security features with 24/7 customer support and 60% OFF on hosting. This deal is phenomenal and you don’t wanna miss it.
Important details on how to start a mommy blog.
You save $15 right up front on a domain name, this is superb because it lowers your blogging expenses. I highly recommend getting bigger deal for multiple years, you save a ton upfront and you don’t need to worry about any bills. Plus you get bonus points.
When you open the homepage of BlueHost, you will see a green button that says Get Started.
This screen will show up:
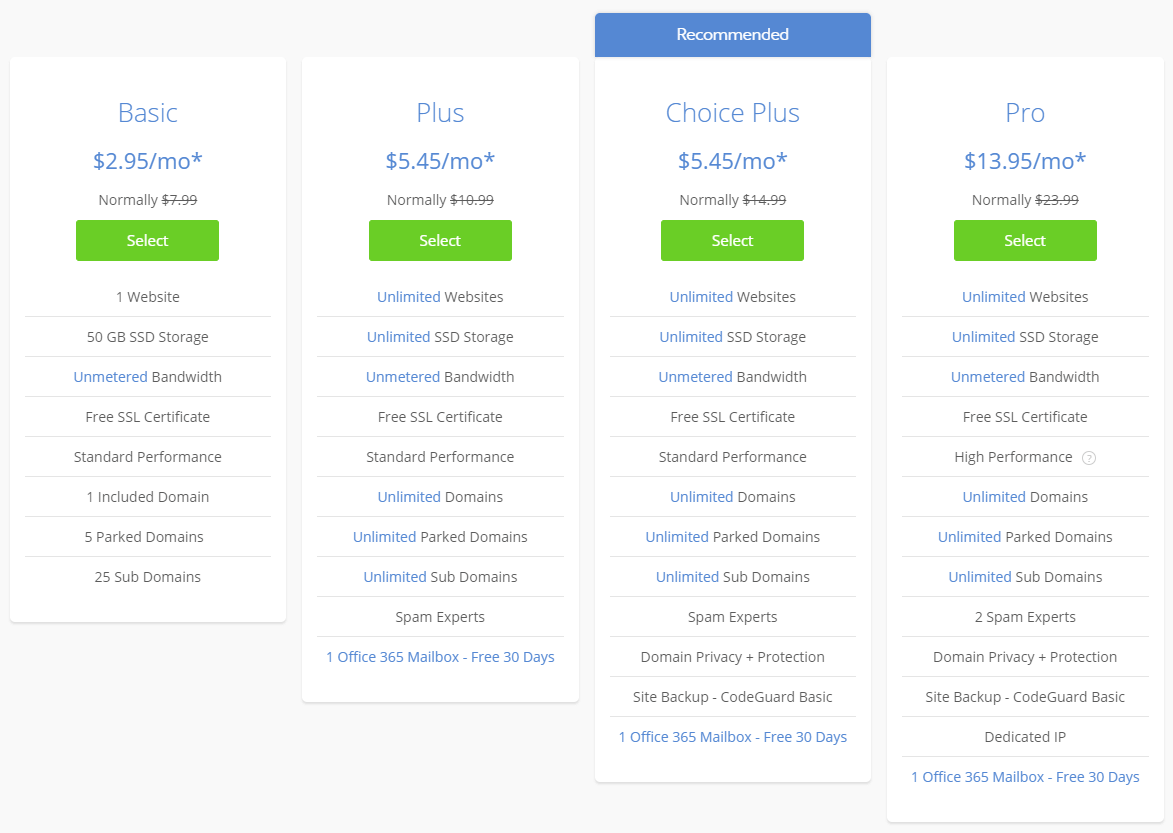
The Basic Plan is perfect for beginners, you get a really good deal on a 50 GB SSD storage with unmetered bandwidth.
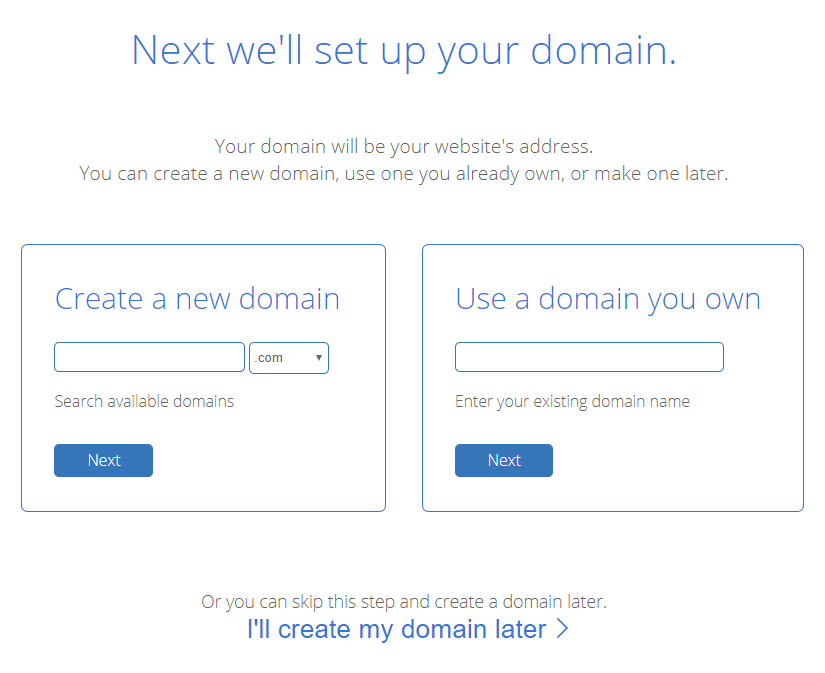
This is the screen where you type your new domain name. After your domain name is available just click next to fill your personal data and make the payment.
If you want to avoid any annoying calls from people, I highly recommend getting domain privacy because BlueHost information will be public and not yours.
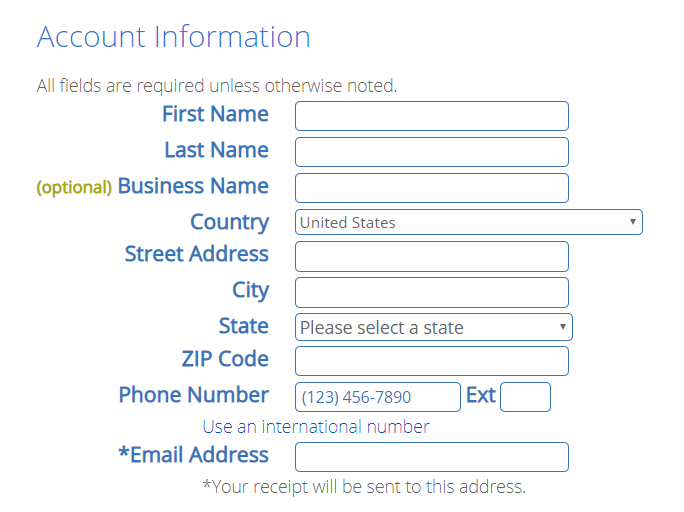
After you sign-up, you need to set up your password and you are inside your BlueHost account.
3. WordPress installation
WordPress is installed automatically on your website once your sign-up with BlueHost. You don’t need to be confused by clicking any buttons or commands that are confusing.
If you are stuck somehow, you can always contact BlueHost amazing customer support, they are available 24/7, they are extremely beginner-friendly, any issue can be resolved under 5 minutes.
One of the reasons I highly recommend BlueHost not only by their performances but also it is recommended by WordPress.org, and I’ve used it for my websites for many years, and they never failed me down.
Now once your WordPress is installed, you can wonder how to log in.
Pretty easy, head over to yourdomain.com/wp-admin and the following screen will show up.
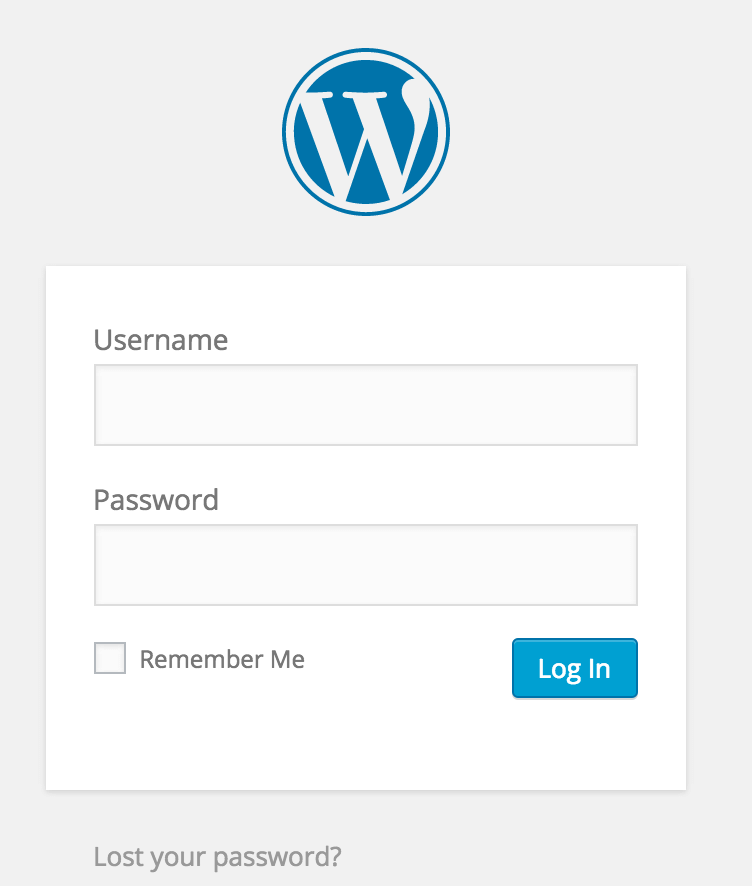
You type your username and password and boom you are inside the Dashboard.
First thing I highly recommend is heading over to Settings -> Permalinks. You can see this and the left side.
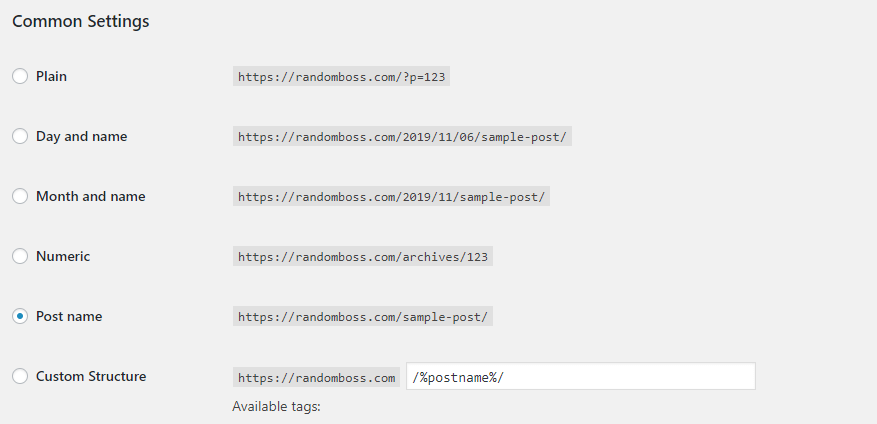
Select the “Post name” and then save the changes. It is much easier and better looking and cleaner.
An example can be yourdomain.com/mommy-tips is better looking than yourdomain.com/2025/01/01/mommy-tips.
4. Install Plugins
You need a few plugins that will help your mommy blogger to perform the best under the search engines.
When you are inside on the dashboard, on the left you will see Plugins, point at it and click Add New.
This is where you install plugins and activate them.
Plugins recommended:
- Yoast SEO: This is a must install plugin because can guide you better if you have any on-page mistakes. This can create a sitemap.xml for search console for Google.
- WordFence: Security plugin to protect your website from spammers.
- Social Pug: Plugin to allow your readers to share your posts on social media.
- Wp Content Copy & Protection: This is a plugin that will protect your content so your visitors can steal it and put it on their website.
- WP Forms: This is a plugin so you can create a contact form for your visitors to be able to contact you.
- W3 Total Cache: Plugin to offload some of the work servers needs to do, this can make your website loading faster.
All of the above plugins are free, some of them have a paid version and once your mommy blogger gets profitable, it is nice to upgrade them.
5. WordPress Theme
The next thing to make your blog looking good, is to install a good looking theme to help your readers engaged and to love coming back on your mommy blog.
You can choose between a free theme or a paid theme.
Head over to Appearance -> Themes -> Add New. When you click on popular you can see a 1000s of themes that are available for free, you can instantly install it. These themes work really good, but once your blog gets popular and profitable you can always upgrade to the pro version of the theme.
For paid themes I highly recommend StudioPress. These themes are regularly updated and are extremely SEO friendly, and you can easily manage them. This will make your blog unique and they usually cost $50-100 depending on themes features.
6. Getting Logo
If you have some designing skills, you should check out Canva.com. They are free to create a logo or any kind of images like youtube channel art or facebook covers. I use them daily.
Another option is heading over to Fiverr, they are extremely cheap and you can get a good decent logo for less than $20. Make sure the designer has revisions if you are not happy with your logo they can always go back to change it.
7. Pages
This is important if you wanna attach your readers with you. You can create a few pages on your mommy blog.
Few examples:
- About or My Story page: This is where you explain why you started your mommy blog and what motivated you writing.
- Contact page: If some visitors want to contact you for any help or collaborations, it is important to have a contact page.
- Copyright page: explain on this page that your content is 100% yours and it is forbidden to be stolen.
8. How to Start a Mommy Blog with Quality
This is really important, you wanna have well-written posts that can always help or teach something your readers. You want to have engaging posts that are rich with images and stories. You can write for whatever you want, like traveling with your babies or breastfeeding them or how to parent them, just make sure your post has 1000 words or more. This can help you with ranking on Google for the low competition keywords, and you will have a phenomenal blog as well.
It is better to post 6-7 times a month 1000-2000 words per post than having 30 posts with 200 words.

This can be very beneficial for your blog, you can always bring more traffic and help readers learn something with a longer post.
Involving the best social media for your blog is:
- Instagram: this is an image and video platform, and just putting your blog in bio can help you bring organic visitors to your blog. You can always tell your followers when you post a new blog post or let them read your blog by clicking the link in bio. There are a ton of online blogs that use Instagram for getting traffic on their blogs. You can use also Instagram scheduling app to post or repost photos.
- Pinterest: a perfect platform where is mostly women. You can always put a photo and go viral. Pinterest can bring a lot of traffic to your mommy blog.
- YouTube: if you are not afraid to be in front of a camera, then starting a youtube channel can be very beneficial. And if you are afraid to show your face on YouTube you can always put videos that are royalty-free. YouTube can bring a lot of traffic for years because videos stay there forever.
10. How to Start a Mommy Blog and Make Money

Once your blog is up and running, you can start thinking for monetizing. Luckily for you, there are a ton of things that you can do to monetize it. Once you build trust with your readers, you can always refer them to something and they will purchase it.
Some ways to monetize your mommy blog:
Affiliate Marketing:
You can always recommend digital or physical products to your readers. You can find offers for Affiliate Marketing on ClickBank. There are a ton of offers for health on ClickBank. And you can always recommend them and get a commission on them.
Amazon Associates:
You can recommend the latest products you use that help you feed your newborn or usually what you use like wipers or any product on Amazon. You can recommend these products from Amazon and get a 3-10% commission on them. And this will be with no extra costs for your readers.
Google Adsense:
This is a common way of monetizing your blog. You need to put a google ad banner on your first paragraph on your post. You can also install the Quick Adsense plugin for better managing your banners. Once you past 10k visitors per month, you can switch to Ezoic or Mediavine. This way you will get 10x on what you earned with Google Adsense. The 10k visitors’ mark is because they don’t allow websites with low visitor count.
How to Start a Mommy Blog – Conclusion
Do not think that there are too many family or mommy blogs. This is a weak mentality.
Your blog will be unique and you will share your own story. That’s why you can stand out from the crowd.
If you want to be successful blogging, you need to put a steady content. This is not a sprint, it is a marathon and it is all about your readers by helping and teaching them.
Once your mommy blogger gets a bit of authority in Google, you can easily start ranking for low-competition keywords.
There are a lot of new moms every day so don’t be afraid to start your mommy blog.
Go ahead and make the jump!


This is phenomenal article, very well explained and knowledgeable.