This blog is a complete step by step guide on how to start a blog with SiteGround successfully and start your blogging journey. SiteGround grew immensely in the last couple of years and became one of the leading top web hosting platforms today.
One thing that most bloggers love is that you can work from home full time, spend time with your loved ones and write valuable posts for the audience. Blogging usually starts as a hobby for most people but after some time, you will be amazed at the opportunities you get.
Starting a blog with SiteGround is much easier than most people think. You don’t need to have any coding skills, you will only need a small investment that can be well worth after a while.
I need to mention that being patient is really important when you first start because most of the bloggers don’t make money in the first couple of months. Having the right plan and then go out and execute it crucial, from building in-depth articles to optimizing your on-page SEO. It will take some time to build authority and high-quality content. Once you get some experience with blogging, you can start to think about tweaking things and monetizing your blog.
Why starting with SiteGround?
Most beginners use cheaper hosting for like 10$/yr hostings, why you should start a blog with SiteGround? Usually, most of the people that start with that cheap web hostings like less than a $1 month, have lots of troubles later on. And please avoid free hostings, weebly.com or blogspot.com, they will run ads on your blog and it can be easily shut down at any time.
When you use $10/year hosting, you will experience a lot of downtime on your blog, slow loading speed on your website, and usually, this is a red flag for Google. Plus the customer support is horrible on these web hosts.
Ranking for keywords can be very difficult even for super low competition ones, your website can be down and slow, and on top of it, your visitors will not appreciate it.
You may wonder why I’m telling you this. I was in the same place and started the same. You will remove the struggles by starting your blog with SiteGround.
SiteGround Benefits:
- Budget-Friendly for Beginners
- Phenomenal WordPress features and recommend by WordPress
- Excellent Customer Support
Let us move forward.
1. Domain name and Hosting
Depending on what niche you want to hop in, you need to have a domain name in mind. One of the easiest ways to think of a name is maybe having your full name or your first name + blog.
I recommend having something easy and catchy to remember for your visitors to always come back to visit. Going with .com is a great way to build trust from the start with the visitors.
After you have a name in place, you need to buy a domain name. Then, you will need a place that you can host all the files that are required to have it online. SiteGround is the perfect web hosting to run a safe and successful blog website.
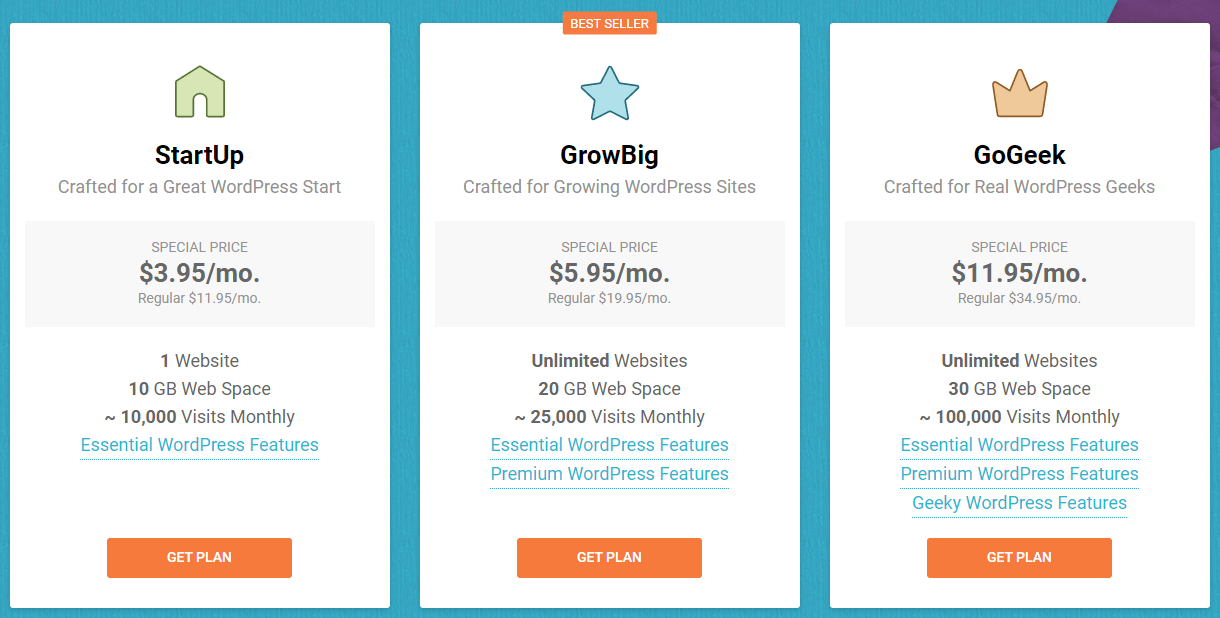
SiteGround offers three WordPress plans, and I recommend starting with the StartUp plan. Your blog will be brand new and it will not require a lot of resources when you first start.
After you get more visitors, you may need to update to the bigger plans and SiteGround does this effortlessly.
With the StartUp plan, you can host 1 website, have 10 GB of SSD storage, and up to 10,000 monthly visitors to your blog. It is a perfect place and a deal to start your blog.
Click here to check out the WordPress plans on SiteGround.
Choosing the domain name
To start a WordPress Blog with SiteGround you gonna need a domain name that will be a digital address for your blog. Mine is randomboss.com.
The shorter the name is the better. One or two words are perfect, it needs to be bigger is fine. Just keep in mind that people will use word-of-mouth and need to type the domain name in their address bars.

2 ways to go about it, if you have already a domain, or to register a new domain. If you already have a domain name you will just need to update the nameservers the SiteGround gives you.
If you buy a domain name with SiteGround you will not need to worry about the DNS and renew timing when it comes to expiring, it will be the same as the hosting if you choose to go for a 1-year hosting period.
I recommend having the domain purchased from a website called Namecheap. I have all my domain names there and it is crazy cheaper than SiteGround. SiteGround usually charges up to $16/yr without domain privacy, the privacy will cost you around $15 the first year, later for the second years bumps up even more. So the domain registered on SiteGround could cost up to $40 yearly.
If you go with Namecheap the domain and privacy can cost up to $12 every year. Please use .com because that is what most users use and if you use .net means that .com is already in use and something is building a brand name with that name. Make sure your domain name is unique so you can build a brand around it.
If you decide to register with SiteGround and don’t care about pricing, then type the domain name you want to purchase. If you bought the domain from Namecheap, tick the box that you already have a domain name and enter it there. Now, let us move to the next step.
Choosing the plan and making the payment
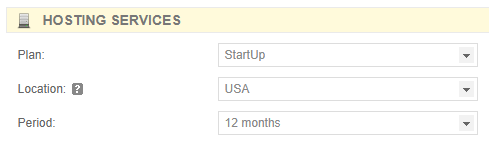
In the purchase information, you need to select the hosting plan, if you are a beginner select the StartUp or if you have more websites you can choose either GrowBig or GoGeek.
Location depending on where you are located from and what your content will be about, you can leave this for the USA. It is available for Singapore, United Kingdom, the USA, and Europe.
The period of billing can be selected for 12, 24 or 36 months.
After that, you will need to enter your card details, tick on that you agree with the SiteGround Terms of Service and then proceed with the payment. If you want to pay with PayPal you need to contact the host’s sales department.
Click here to start with SiteGround if you haven’t already!
The next step is to install WordPress on your blog, let’s move forward.
2. Install WordPress
Once you successfully completed the order, click on proceed. You will be redirected to the setup wizard, this is how you install WordPress.
- Make sure to not use admin for your username. Hackers will try to break the password if you use admin.
- Do not use the full name or your name only.
- Mix it up, you can your first later of name and then use numbers. Change things up and write it down somewhere on a piece of paper.
Confirm when you are done. SiteGround recommends the SG Site Scanner, but there are free plugins that will make sure your website is safe.
Connect the domain with SiteGround
You can skip this if you purchased domain with SiteGround.
In the email you receive from SiteGround, there will be the nameservers for your hosting. You will need to point these to your SiteGround server.
If you use Namecheap, click on manage the domain and in the Nameservers section choose custom DNS. Copy and paste the nameservers that you receive from SiteGround and click on the blue checkmark.

After you completed that, make sure to visit your site and see if it is done. Namecheap states that can take up to 48 hours, but it is usually done in a few minutes.
If it is everything good to go, you may ask yourself how to access your blog.
Pretty easy, head over to yourblog.com/wp-admin to access the WordPress backend. In yourblog.com enter your domain name.
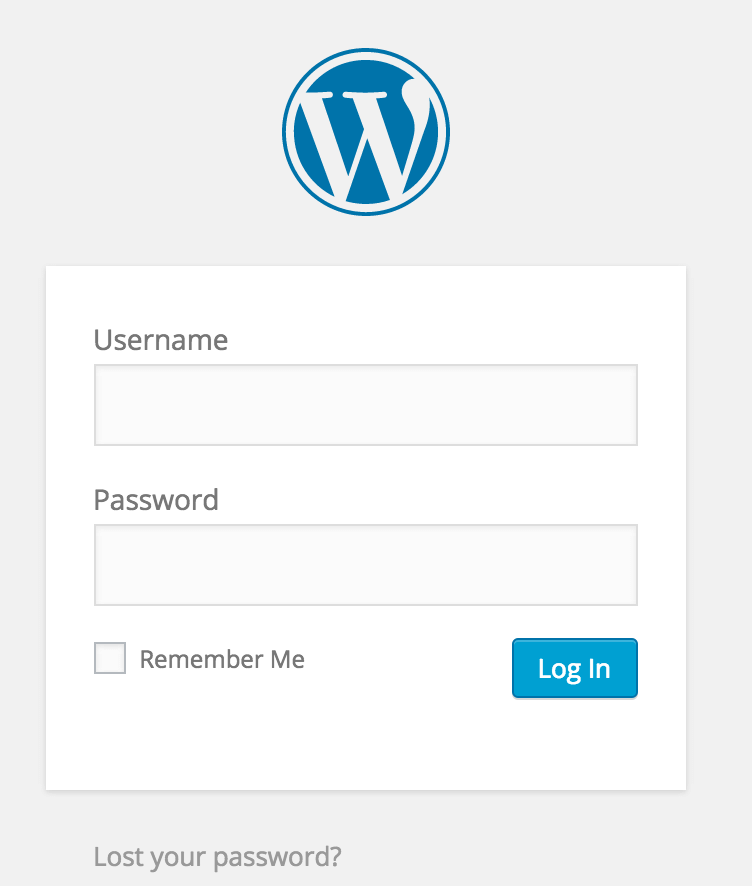
Put the username and password you created, then you will see the dashboard of your blog.
The first thing I highly recommend is changing the permalinks. Head over to Settings -> Permalinks.
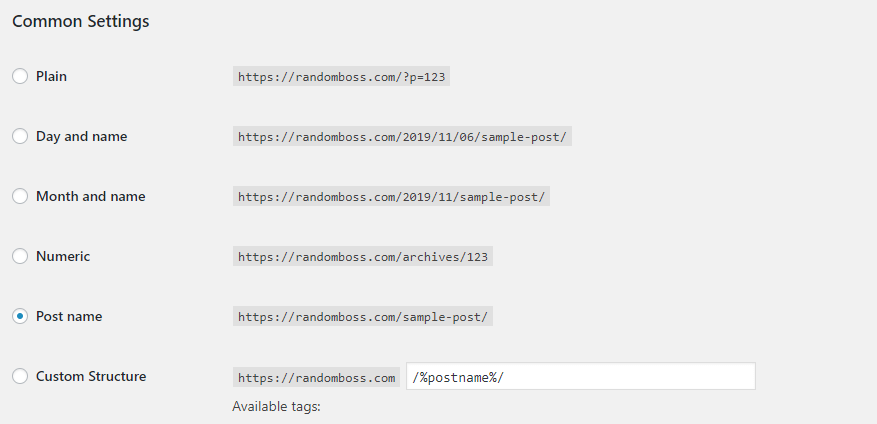
You need to select the Post name and save the changes. This is important if you want your blog URLs to look friendly and legit.
The URL will look something like yourblog.com/blog-post, and like yourblog.com/2025/01/01/post-here.
3. Install WordPress Theme
You want your visitors to easily navigate within your blog, that’s why it is important to choose a good theme.
You have two options when it comes to a WordPress theme, you can have a free theme and paid theme.
Usually the free themes to the job just fine, but once your blog gets more popular, it is nice to start using a pro theme or upgrading your current one to unlock their full features.
With paid themes, you get what you pay for it. They are better optimized for SEO, they are always up-to-date from their developers. Usually a premium theme could go around $20-250. StudioPress has the most impressive themes and Matt Cutts uses them, and they are really fun to work on.
What you should look into a theme?
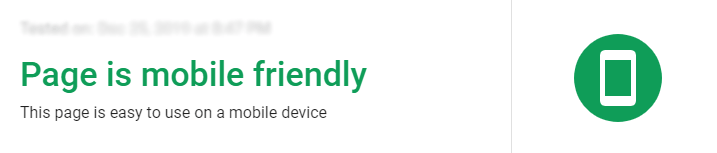
Make sure the theme is Simple, that works on every browser and it is responsive.
Google loves mobile-friendly websites and will rank them higher in the search engines. You can test your blog on the Google mobile-friendly test page, and you should get results like this:
Head over to Appearance -> Themes and then Add New.
You can search the most popular themes in the marketplace and choose one that will suit you and your blog. If you decide to go with a paid theme, you will be given a .zip file and you need to upload it in the themes section and click on Upload Theme.
The next step is installing a couple of plugins for your website to perform better for the search engines and for the visitors.
4. Install Plugins
Installing a couple of plugins is important to help your website perform better for the search engines. Installing lightweight plugins is a must, we don’t want to use plugins that require much CPU.
On the left side of the dashboard you need to point at Plugins, then click Add New.
Recommended plugins:
- Yoast SEO: Perfect to optimize your posts for On-Page SEO, you can create a sitemap.xml for the Google search console. It will allow Google to crawl your blog easier.
- Social Pug: Great plugin to allow your readers to share your posts on their social media.
- Block Bad Queries (BBQ): Only needs to be installed and activated. It will protect your website from malware.
- WP Fastest Cache: Will cut down the work the hosting server needs to do, plus it can connect to any CDN provider like Cloudflare or BunnyCDN.
- Autoptimize: This will help the speed as well by optimizing your CSS, JS and lazy loading images.
- Heartbeat Control by WPRocket: Disabling the dashboard, frontend and post editor can be very helpful. After you install it you can find it by pointing in Settings.
- Self-Hosted Google Fonts: Works with any theme, just enable it.
- WP Forms: Great plugin to create a contact form.
- WP-Optimize: It will help with cleaning the database and compressing images.
Every plugin above is free to install. Most of them have a pro version where you can unlock all the features. I recommend doing this once your blog gets profitable.
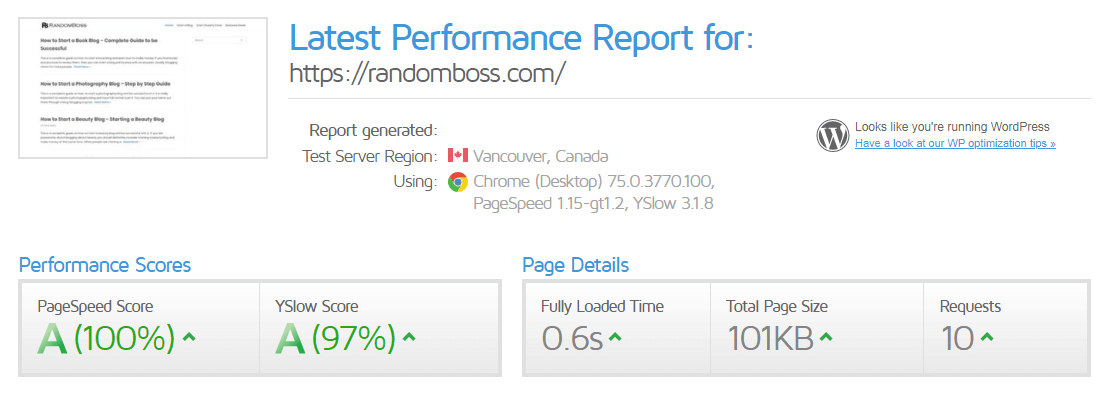
Following the steps above, I’ve managed to get phenomenal performances on GTmetrix. My results:
5. Adding pages
Adding a couple of pages to your blog that you readers can connect with you and trust you more.
About page
This is where you type about yourself and what your blog is about. This is one of the best ways to connect with your readers and let them know what value you will bring to them.
Contact page
This is where you can be contacted for any kind of help or collaboration with you. WP Forms plugin will help you create a contact page.
Copyright page
This is where you explain that your content is fully yours and no one can copy it without permission.
Depending on what niche you are in, these are the most common pages.
6. Writing your first blog post
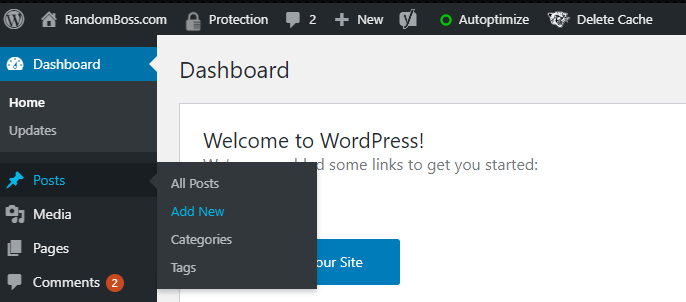
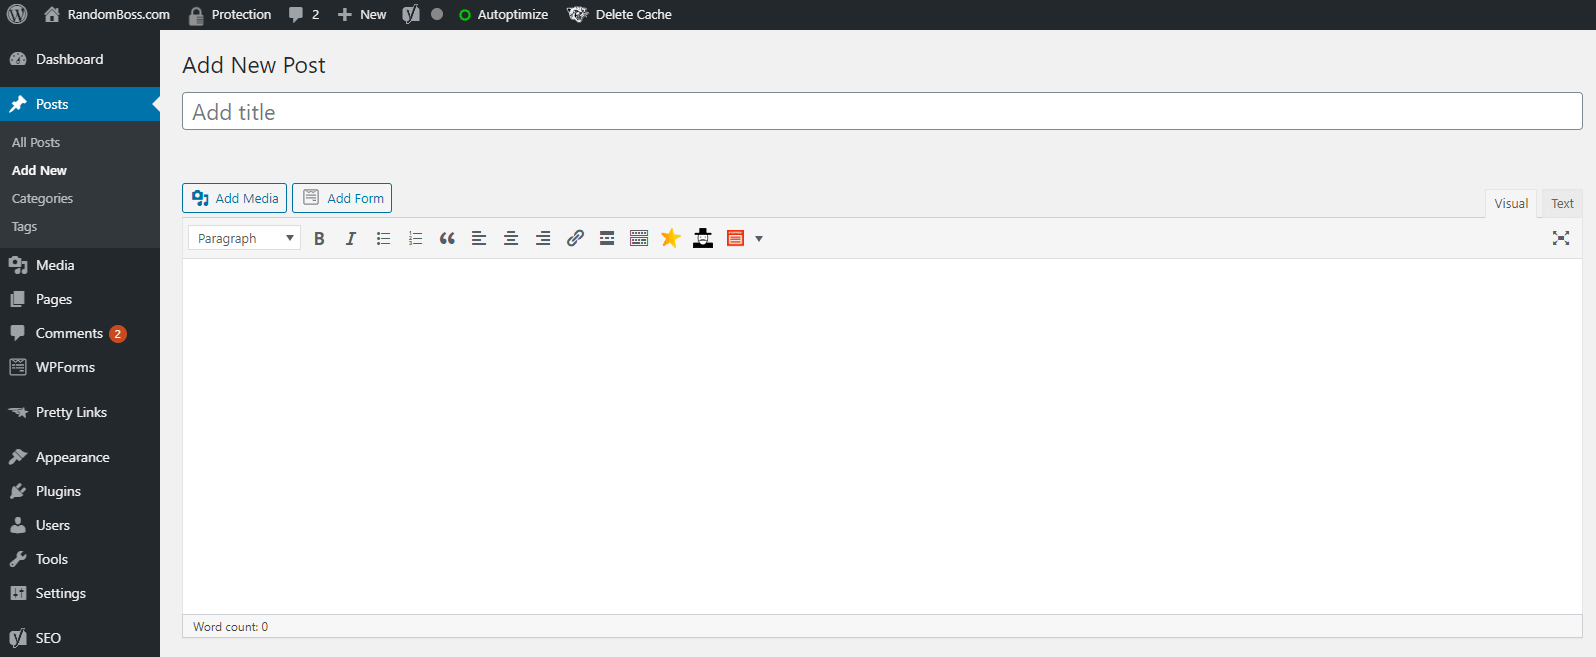
On the left side of your dashboard point at Posts and then Add New.
This is where you write your headline and the content.
Check my complete guide on this here.
If your headline is bigger, make sure to edit the URL to make it shorter. Good example:
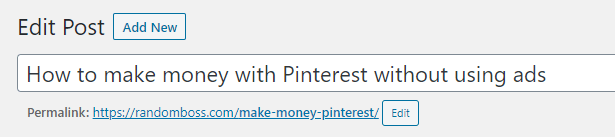
Make sure to keep the URL as short as possible, and each word separated. Avoid using numbers and include your target keyword. Check the On-Page SEO with Yoast SEO, then make the improvements and hit publish.
Congrats on writing your first blog post!
How to start a WordPress blog with SiteGround – Conclusion
Time to wrap up this blog post, learning how to start a blog with SiteGround may seem impossible, but we managed to get it done.
Don’t fear about the competition, it is a weak mentality, Google gets over 5.6 billion searches per day. 5.6 Billion!
This is a good example that you can start something to be successful and it will be your unique story. This is a mentality you need to have.
You are sharing your own story, that’s why you will stand out from the crowd.
Hopefully that this guide on how to start a WordPress blog with SiteGround helped you to start something that will be well worth it. Let me know in the comments if you have any questions.
Don’t be afraid to make the jump.

Why SiteGround?
Perfect place to get the best performance for your blog, the loading speed is phenomenal and they are one of the best web hosting providers today.
Is SiteGround good for blogging?
Learning how to start a WordPress blog with SiteGround is really easy because of its simplicity, easy interface and the excellent customer support you get.
Is SiteGround secure?
They are a legitimate, well-established secure company that provides web hosting services. Founded in 2004 in Sofia, Bulgaria. In the most recent reports, they host close to 2 million domains.