This is a complete step by step guide on how to start an Art blog. Starting an art blog is one of the best ways to build a brand for yourself as an artist, and to try and sell your art.
One of the most impressive things about blogging is that you can work from home full time, spend more time with your close ones and write valuable posts and art for your audience. Blogging usually starts as a hobby for some people, but after a while, you might be surprised at the opportunities you gonna get. The reason why I like blogging, it’s because it is a gift that keeps on giving. You don’t need to post daily, but you need to work consistently.
Starting an Art Blog is much easier than most people think. Thinking that you need to have any coding skills is a thing in the past. The only thing needed is a small investment that can be very worth after a while. Starting an art blog is a great way to extend your creativity.
I need to mention that being patient is really important when you first start. Most bloggers don’t make money in the first month. Having the right plan and strategy to go out and execute a plan is crucial. It will take some time for you to build some authority, and once you get some experience with art blogging, you will start to rank in the search engines to attract visitors to your art blog. The benefits of blogging are timeless.
Let’s move to the next step.
Disclosure: Please note that some of the links are affiliate links and at no additional cost to you, I’ll earn a commission. When you purchase hosting using my affiliate links, they compensate me, which helps make this guide free of charge to you and ensuring you to get the best possible deal. I only recommend services that I’ve personally used and stand behind.
1. Domain name and Hosting
You will need to have a name in mind for your blog, it can be a personal preference and branding decision. Going with something easy and catchy to remember so your visitors can type it in the address box so they can always go back to visit your blog.
I recommend going with .com or .art extension. You can use your full name as a domain, or you can do something like artbyname.com. The art extension is gaining a lot of popularity for many artists.
I do not advise any of my readers to start a blog with a free platform like Weebly or Blogspot. Your blog will look something like yourblog.weebly.com and will not build trust with your readers.
The other reason is not having full control over it, it can be easily shut down and be full of ads. Follow below how to get a domain name for free.
Getting the Domain and Hosting
Usually, the domain name could cost up to $18 per year, and the hosting plan can cost around $10 per month. This can be a lot for some people in certain countries, that’s why I have a special deal for you.
Getting a hosting that will have fast loading time and uptime is crucial to building a successful blog online. I’ve seen studies that show that websites that load more than 3 seconds, visitors leave.
This will cost you money because visitors will bounce out of your blog without seeing your content. Starting the blog from the start successfully with a top web hosting is the best way to go.
For as little as $2.95 per month, you get a FREE domain name for one year (yeah, free), FREE SSL certificate that protects your visitor’s data (builds trust and most hosting companies charge money for this feature), amazing security features with 24/7 customer support with 60% OFF on hosting. This is a deal that you don’t want to miss.

When you open the BlueHost‘s homepage, click Get Started.
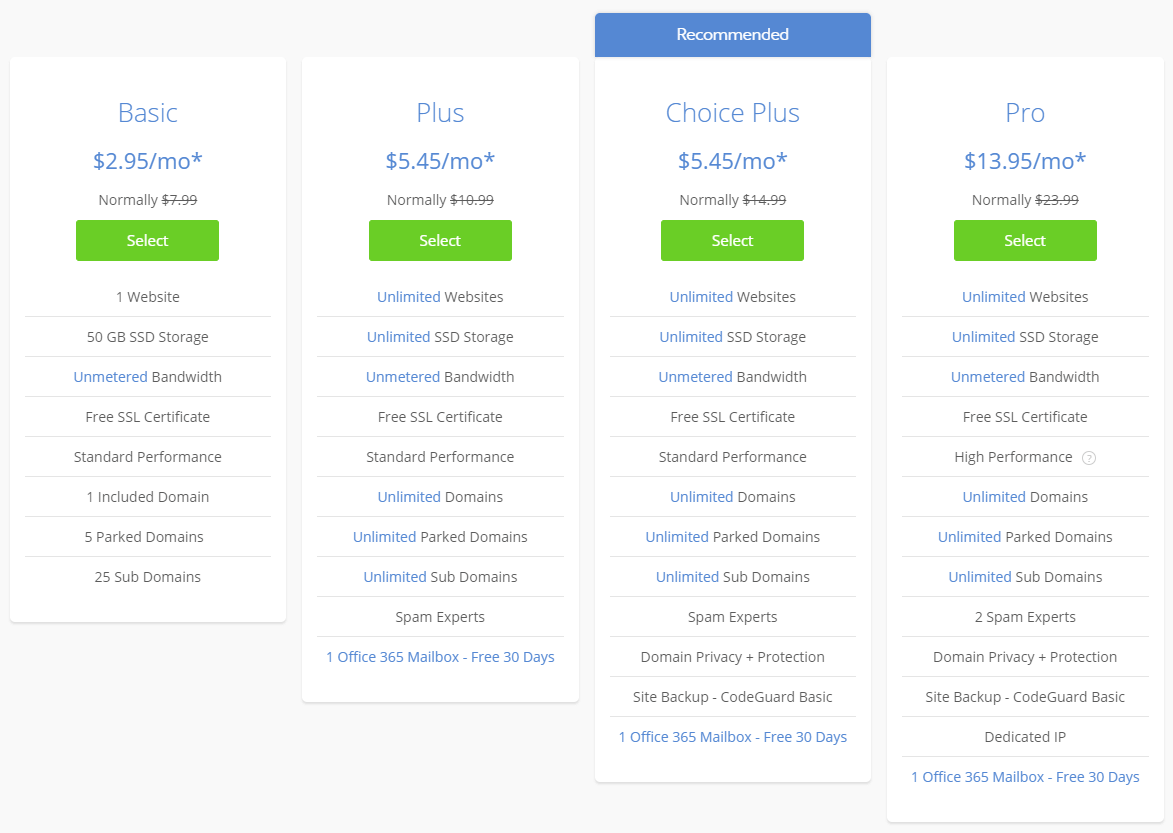
Getting the Basic plan is perfect for a new blogger, you will get 50 GB SSD storage and unmetered bandwidth. Once you get more popular, you can always upgrade to a bigger plan for more resources.
Getting the 36-months deal will be the lowest possible price for hosting, and you don’t need to worry about hosting bills in 3 years. You can pay for one or two years, but the price will slightly rise.
BlueHost offers a 30-day money-back guarantee, they will refund you without any questions asked if you are not satisfied with them.
Awesome deal to start an art blog and your blogging journey.
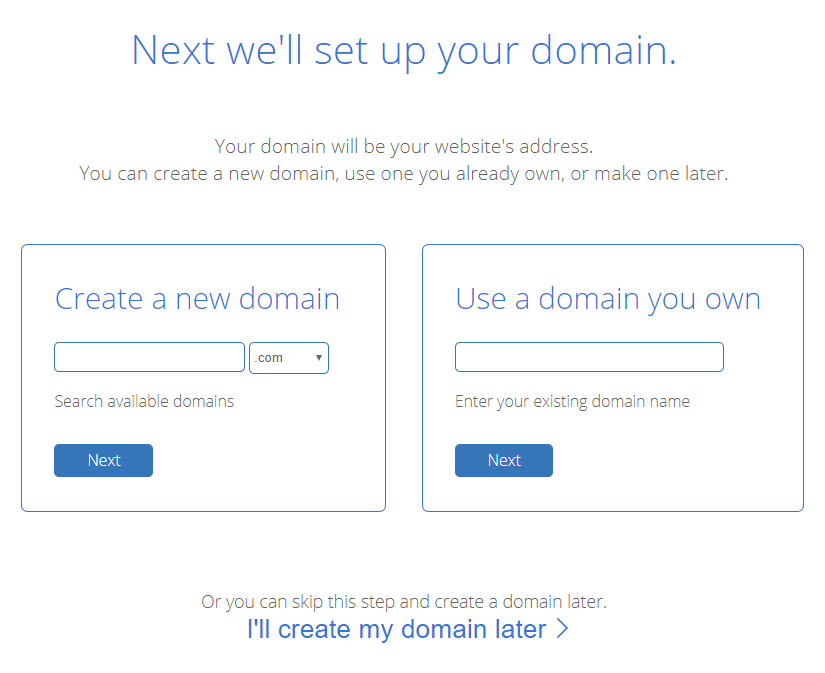
Type the domain name that you will name your art blog, or skip it and add it later.
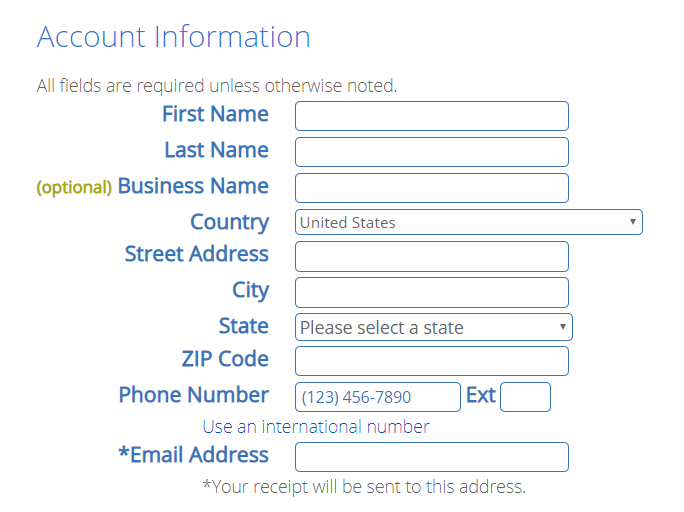
This is where you put the personal information. Getting domain privacy will ensure personal information to be safe and not get any annoying calls from people that wanna help with your blog. When you get privacy BlueHost information will be public and not yours.
If you are on a budget, you can upgrade it later.
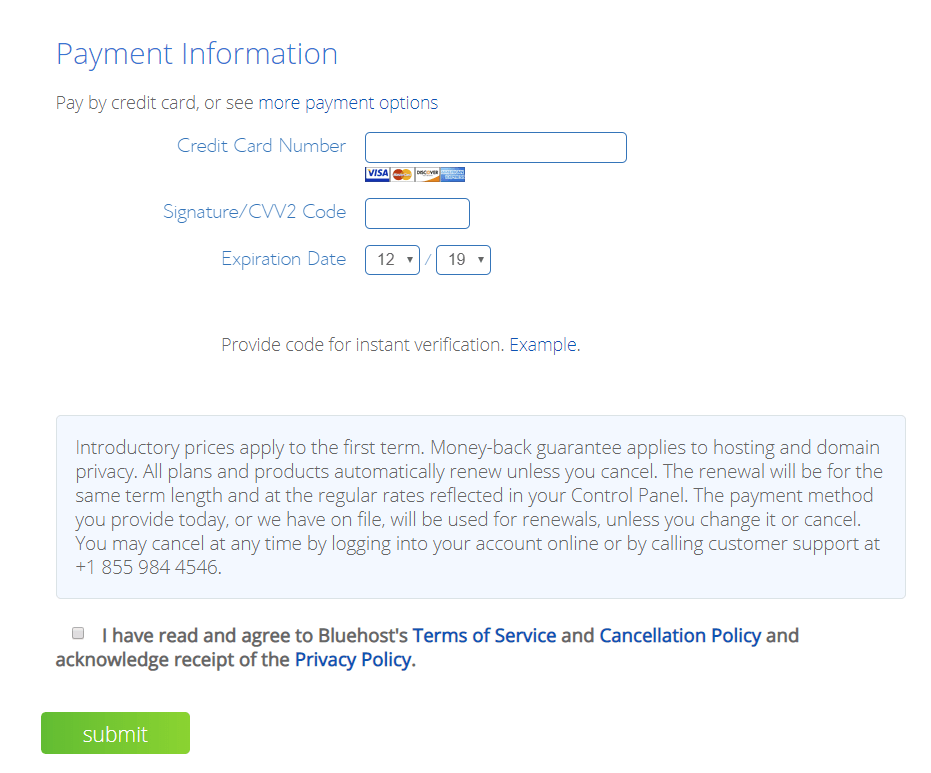
You need to tick the box that you agree with BlueHost’s terms of services and hit the green Submit button.
Congrats on learning how to start an Art Blog!
Click here if you haven’t started already.
The next step is installing WordPress (CMS), which does not require any tech knowledge.
2. Install WordPress
After you make the payment for hosting, you need to pick a basic theme and click on Start Building.
BlueHost makes it easier to install WordPress because they offer one-click installers. This is the best option because it is extremely user-friendly, it will index your post much faster and optimizing your On-Page SEO is really easy.
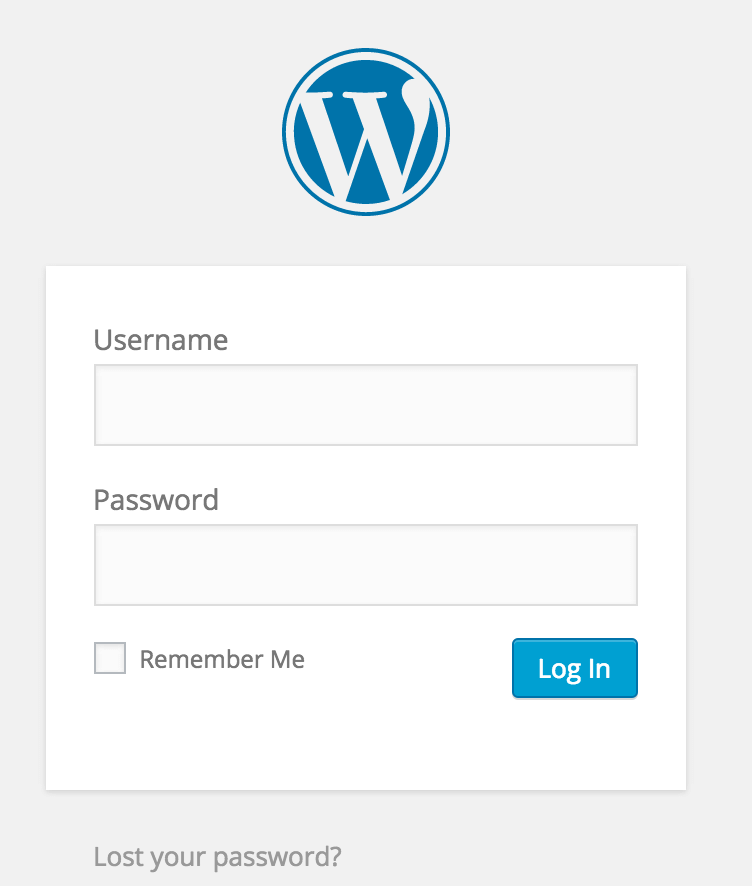
After you install WordPress under a minute, you may wonder how to log in?
example.com/wp-admin/
In the example, you put your own domain name.
I highly recommend to change something in Settings -> Permalinks.
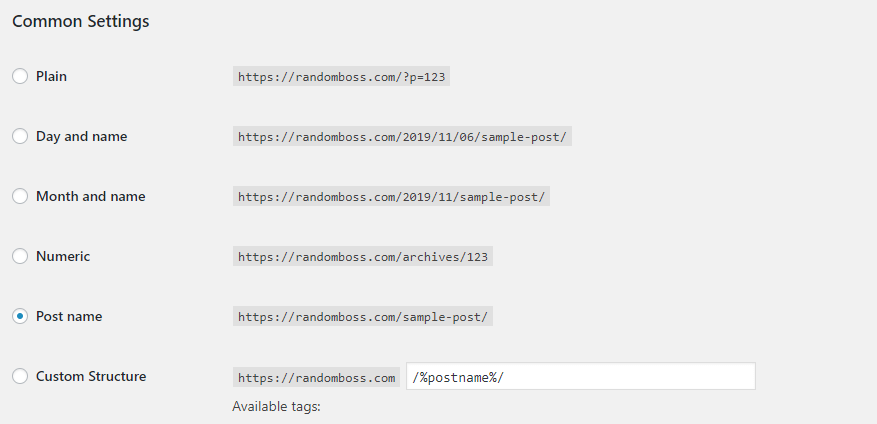
Changing the permalinks to Post name is great for your blog to be user-friendly. The URLs will be shorter and better for search engines.
One example could be yourblog.com/art-post is better than yourblog.com/2025/01/01/art-post.
3. Install Theme
Installing a good theme will be attractive to visitors. It should be simple because it will load the blog faster.
You can find themes on the left side in Appearance -> Themes -> Add New. You can search for the most popular themes and choose one for your blog.
Most of these themes have a PRO version, so if you really like a specific theme, you can always upgrade to its PRO version to unlock all features.
Another option is using a PRO theme from StudioPress. They are super lightweight themes and popular among bloggers. These themes are always up to date and their developers always take good care of themes.
Depending on the theme features, you are looking at around $25-250 for a PRO theme. They are easy to work on and are SEO-friendly.
The next step is to install a few plugins.
4. Plugins
On the left side of the dashboard, point at Plugins and click Add New.
Installing a couple of plugins will help your website perform better for your visitors and for the search engine. The plugins I recommend are lightweight and will improve website loading speed.
- Yoast SEO: This is a plugin that will help you with On-Page SEO optimization and to create a sitemap.xml for Google search console.
- WP Fastest Cache: It is a cache plugin that can delete the cache in your blog and it can be easily connected with any CDN provider.
- Social Pug: Allows your readers to share your art content on social media.
- Block Bad Queries (BBQ): Plugin to prevent malware.
- WP Forms: Awesome contact form plugin.
- Autoptimize: It will make your website loading faster with optimizing CSS, JS, and images.
- Self Hosted Google Fonts: Needs to be enabled so you can host fonts locally.
- WP-Optimize: This plugin will clean your database.
Most of these plugins have PRO versions, they are free to install and the free version work really well. Once you get profitable and love blogging about art, you can always upgrade to unlock their features.
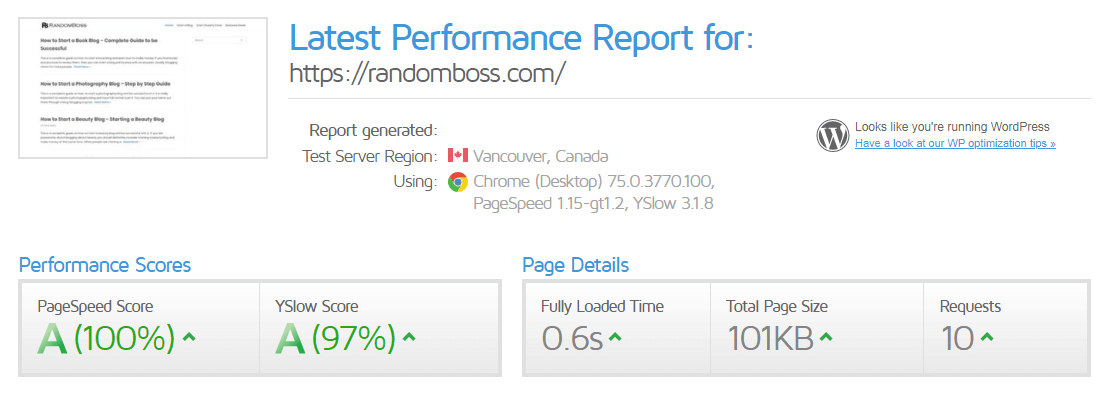
Following the steps above, I manage to get perfect performance on GTMetrix:
5. Adding Pages
This is a great way to let your visitors know more about your blog.
- About page: Tell your story as an artist and why you decided to start an art blog. It will connect you more with your readers.
- Contact page: Maybe a reader wants to collaborate with you, so it is a great way for them to know where to contact you.
- Copyright page: If you value your art, you may want to have a page that your art and contact written is 100% and no one can steal it without permission.
These are some examples, depending on your theme you may need to add more.
6. Writing your first post
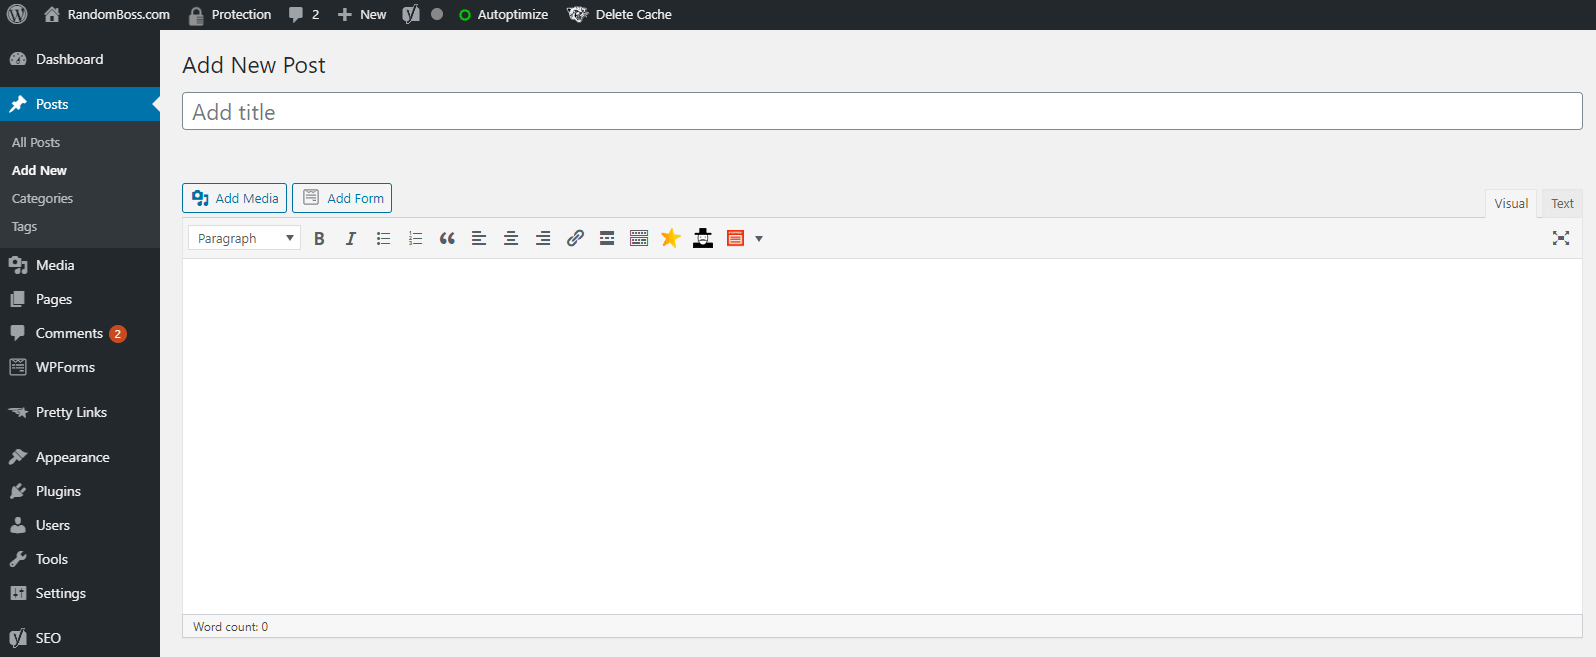
On the left side of the dashboard point at Posts, then click Add New.
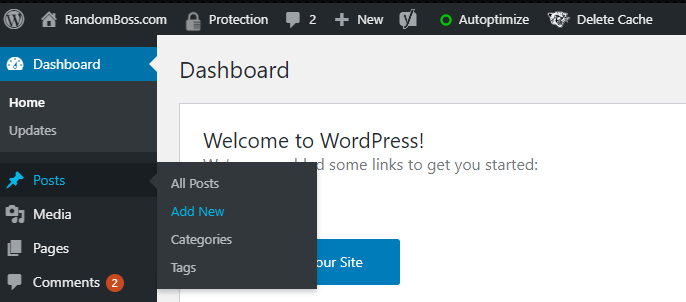
Here is where you type the blog headline and content.
Make your URL SEO friendly and as short as possible, it will look better.
Good example:
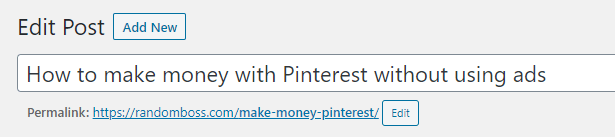
When you click Edit, you can make it shorter. Please avoid numbers and use the target keyword phrase.
Create a category in +Add New Category on the right side, you can make it broader like Art, tick the box and it will be under that category so you can hit Publish.
Note: No need to do it for every new post, only for new ones that don’t have a target category.
Congrats on starting an art blog successfully!
Extra Blogging Tips for Beginners
How to make money with your Art Blog
You can sign up and be an Amazon Affiliate. Try making posts of art products, and if your readers purchase something from Amazon, you will make a small commission, with no extra cost on their part.
You can put ads and banners on your blog. Best networks are Mediavine, Ezoic if you have big traffic, if not, Google Adsense is an ad provider and doesn’t require a minimum number of page views.
You can make money as well with sponsored posts. There are a lot of companies that will sponsor you just to write an article for their product and brand. But this can take time and growing before you get sponsors.
Another way of making money is by selling your own service or product. You can create an ebook for beginners and show them step by step on how to become a successful artist.
Write quality posts
This is the best way to achieve success. The more quality content you write, the more valuable your visitors and Google gonna see it. They can easily categorize your content and serve it to the right people that are interested.
You can use Grammarly extension to give you an online grammar checker instantly when you write. You will have fewer mistakes and the content will be cleaner.
Post on a schedule
I usually publish 2 posts a week. It is a great way for me to keep focused and making sure that I provide valuable content for my audience.
When you first start writing, you can start writing once a week, you can do research before each post and to improve everything on it. Quality over quantity when it comes to content. It is better to have 10 in-depth articles that have 2500 words than to have 50 articles with 300 words.
Google loves content.
You can even let know your readers when to come back and check your new blog at the set time.
Not everything will be great when you first start
I recently check my old work on a previous website, and the post had only 300 words. As time goes on, your writing skills will improve, I was terrible when I first started as well.
The design was terrible and not a lot of people wanted to read my posts. Everything was messed up. Once you write 10-15 posts and do research on other bloggers, your writing skills and design skills will improve.
How to start an Art Blog – Conclusion
- Pick the domain name
- Get Hosting (BlueHost)
- Install WordPress
- Install Theme and Plugins
- Add a few pages
- Add your first blog post
- Congrats!
Hopefully, you enjoyed this blog post on how to start an art blog the right and successful way.
Getting into blogging about art is unique because there is more room to enter. The competition is small, and your blog will be unique so you can easily stand out.
It is the best way to have your own platform when you are starting a blog/website. Why letting other companies like Facebook, Twitter, LinkedIn get rich off of you. You can get rich while you have your own platform. You will content with similar minded people worldwide and you can quit your job, no more alarms or commutes or a boss.
That’s why I named my own blog random boss because everyone can make money online and be the best version of themselves.
You can work on your own time and schedule, and everything depends on you. Learning how to start an art blog will pay its dividends throughout your blog career.
Don’t be afraid to make the jump in art blogging!
You can check my full guide and in-depth article for online blogging.