This is by far the most comprehensive guide on how to start a parenting blog. Do you ever want to start a blogging mom or dad? I know you scroll daily and read a lot of blogs and parenting posts on social media like Facebook, Pinterest, or Instagram when your little baby is sleeping.
It is tempting to join in the blogging community, right? It can be one of the best decisions you can make and track your progress and see how far you’ve come.
If you are a parent, mom, or dad and you want to share your experiences and help others to bring up their children, then you have to start a parenting blog. Helping others and getting good earning in return is one of the best feelings in the world.
If you think that you are pro at showing others all the tips, difficulties, and other things about parenting and you just need an authentic way to start this all. You are in the right place then.
In this article, I will show you all the ways and essential things that you need to start a blog because you can earn from your knowledge without and your experiences.
As a parent, you might be wanting to tell the stories and all the stuff you do which is full of fun and excitement.
There are 2 ways on starting a parenting blog, free, and paid way. I do not recommend the free method because you don’t have full control of your blog. It can be easily shut down and your blog will be a subdomain to a specific platform.
The best method is to start with a self-hosting domain. You can be in charge and choose how you will monetize your content and knowledge. This guide is all about learning how to start a parenting blog that will be successful.
Finding your niche
First of all, you have to find and select your niche. There are hundreds of topics and blogs, but you have to try something new and something exciting. You are going to start a parenting blog, then there are many topics and niches like upbringing the child of different ages, medical treatments at home, foodstuff, and many more like this.
Can you monetize or not? If you are a housewife, and you need to earn some to complete your goals, or you are tired from your 9 to 5 job, then you have to give your best to your blog. You can place ads, get the affiliate commissions with many companies like Amazon, eBay and you can sale their products also. It will help you to find your niche if you know about the specific products or you use them in your daily life.
What are you good at? This is the last thing that will help you to find your niche. You have to explore yourself and select your niche. On which topic you can write or which work you like the most. As a mommy, which of the domestic work or which of the circumstances you have faced in upbringing your children. You have to answer these all questions and you will be able to find and select your niche.
1. Getting a Domain name and Hosting
The next step is to select the name of your blog. You have to select and choose the name which suits your blog. You might be thinking about your blog name, you can use some variations with your name and go with nameblog.com, or other ideas like stay at home mom, or cooking with mom. They will also tell you if your idea is already taken or not.
My blog name is Random Boss – and I write about blogging, search engine optimization, Social media promotion, so you don’t need to have a perfect name, just make sure it 2-3 words.
I will suggest you choose the .com domain because it will easy for the readers to find out and also it will attract more people towards your blog.
The next step is to select your hosting website.
What is hosting?
It is the place where you can store your data and what will make your website online. It is crucial to join the best web hosting for beginners, and where you can start your journey as a blogger.
Usually, a domain name could cost up to $18 per year, while web hosting can cost $10-15 per month. I know this can be a lot of money for some people, that’s why I have a very special deal for you.
For as little as $2.95 per month, you get a FREE domain name for one year, FREE SSL certificate that protects visitor data, amazing security features with 24/7 educated customer support with 60% OFF on hosting. This is a deal that you don’t want to miss.

When you open the BlueHost‘s homepage, click on Get Started.
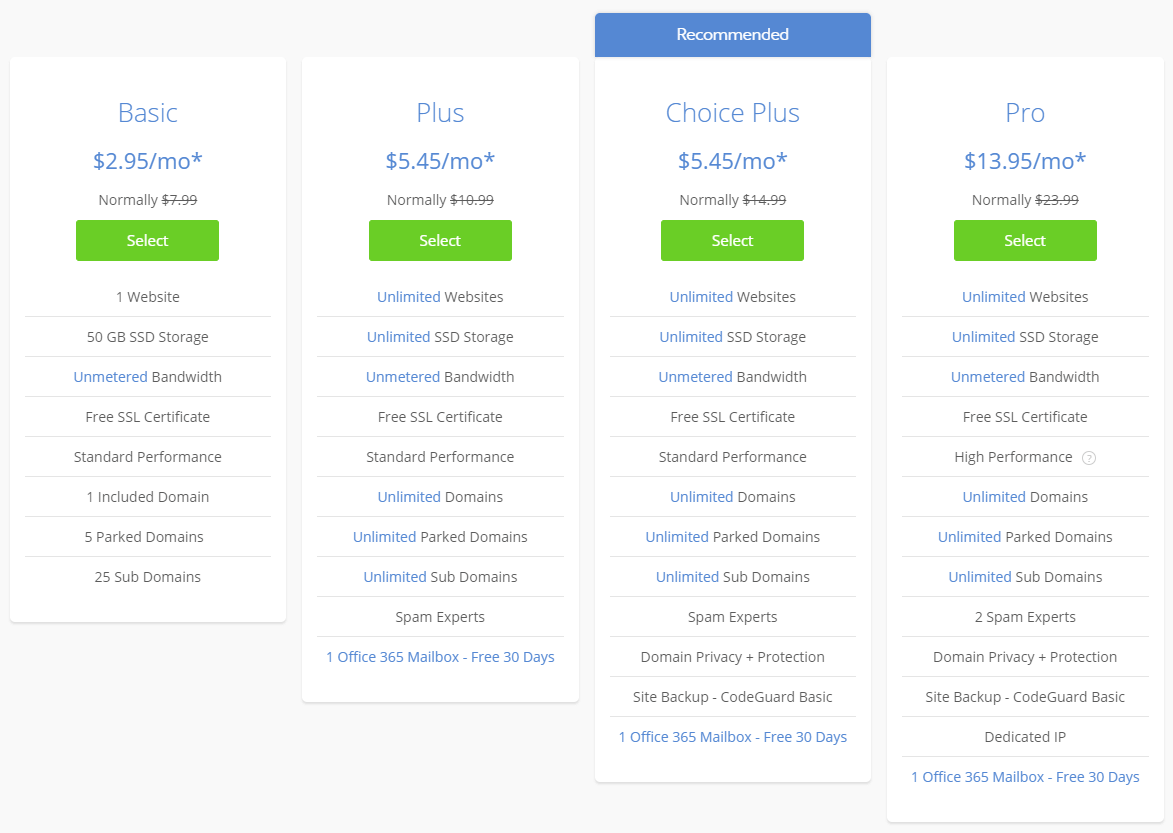
Starting with the Basic Plan
The best plan on BlueHost is the Basic plan because you will have enough resources (50 GB SSD storage + unlimited bandwidth) to start your journey in blogging.
Once you reach 25k monthly visitors, you can upgrade to a bigger plan without any downtime. The 36-month deal ensures you get the best possible deal on hosting, but if you are on a budget, you can choose a 1 or 2-year deal but the price will increase slightly.
Worth mentioning is that BlueHost has a 30-day money-back guarantee, and that’s why this is a deal you don’t want to miss.
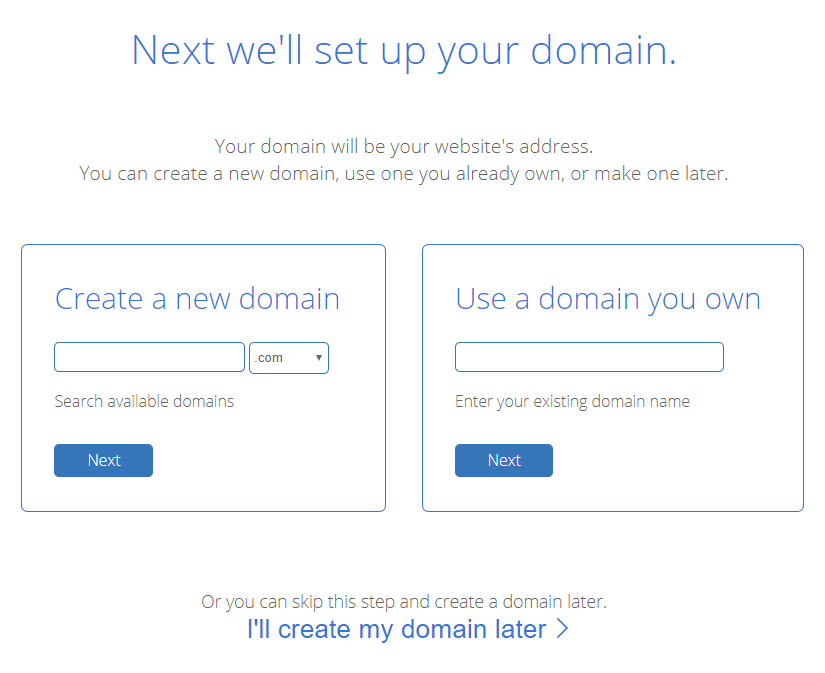
The next step is to choose your domain name and see if it is available, also, you can skip and add it later.
You can choose domain extension like .com, .net, or .org, but I highly recommend going with .com, it is much easier to build a brand around it.
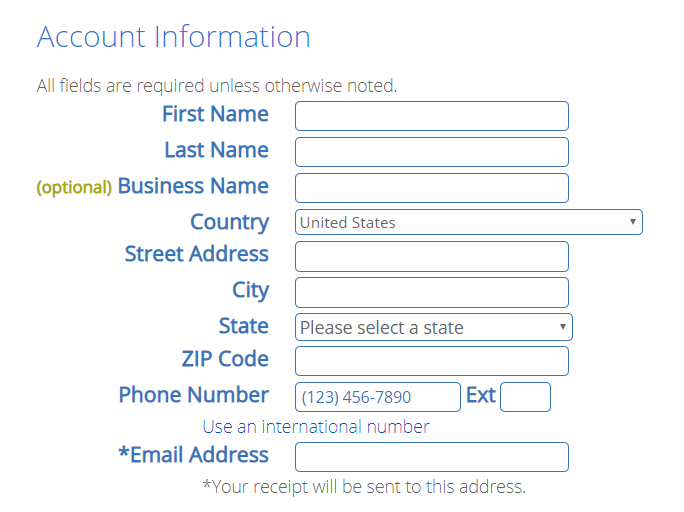
You MUST fill your personal information and if you added a domain in the beginning, it is a great idea to add domain privacy. You will avoid calls from people that wanna help you with your blog on someway (offer you services), but if you are on a budget, you can always upgrade it later.
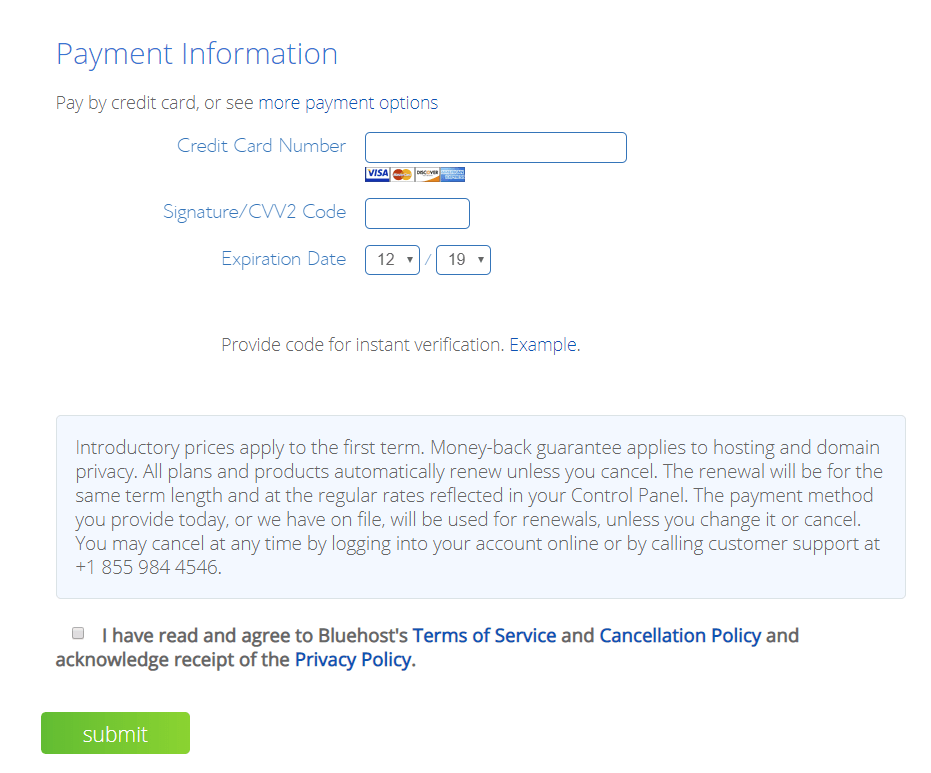
Tick the box that you agree with BlueHost terms of services and hit the Submit button.
Congrats on learning how to start a parenting blog!
Click here if you haven’t started already.
Now, we need to install WordPress (CMS), and thankfully to BlueHost, this is much easier with them.
Disclosure: The Bluehost links above are affiliate links that will provide a small commission to me at no cost to you. These links only track your purchase and credit it to this website. Affiliate links are the primary way that I make money from my blog and that’s how you get this guide for free. BlueHost is the best web hosting option for new bloggers.
Why BlueHost, tho?
- FREE Domain Name for an entire year (saves you $15)
- Extensive 24/7 Customer Support (live chat, call support, entire knowledge base)
- Install WordPress for you (no need for tech knowledge)
- Very affordable (You can start a website for just $2.95 a month 😳)
- Officially recommended by WordPress as one of the best web hosts
2. Installing WordPress
After the payment is completed, you just need to pick a basic theme and click on Start Building.
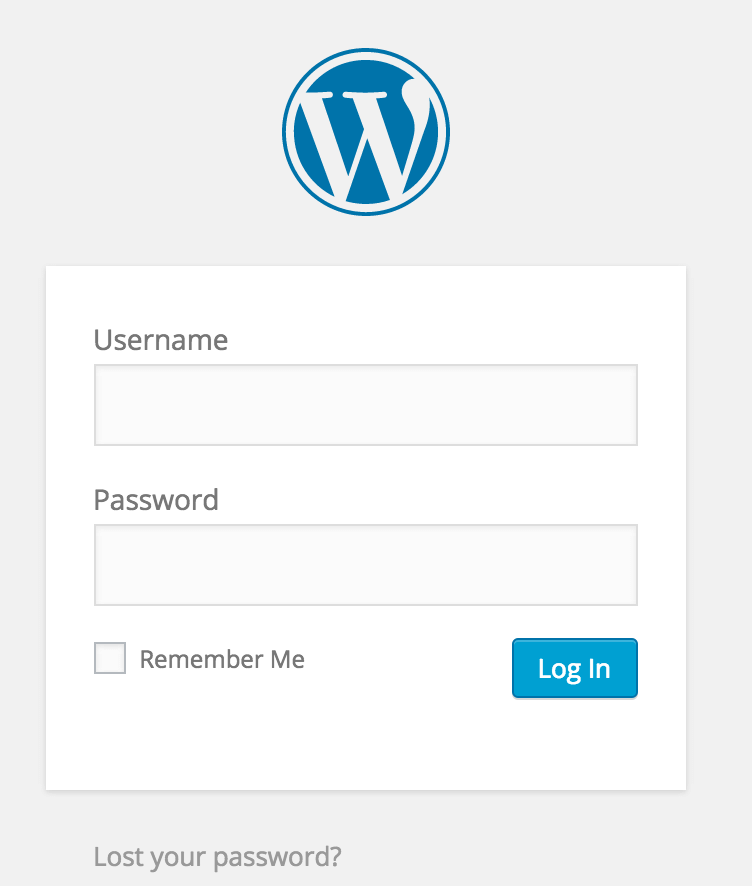
WordPress is so user-friendly and you have everything laid out for you, and you can optimize your blog so easily. WordPress takes a minute to be installed, and if you wonder how to log in, type domain.com/wp-admin on your address bar.
The screen that you will get:
The first thing you should do before installing themes and plugins, you need to change permalinks. Head over to Settings -> Permalinks, and change them to Post name.
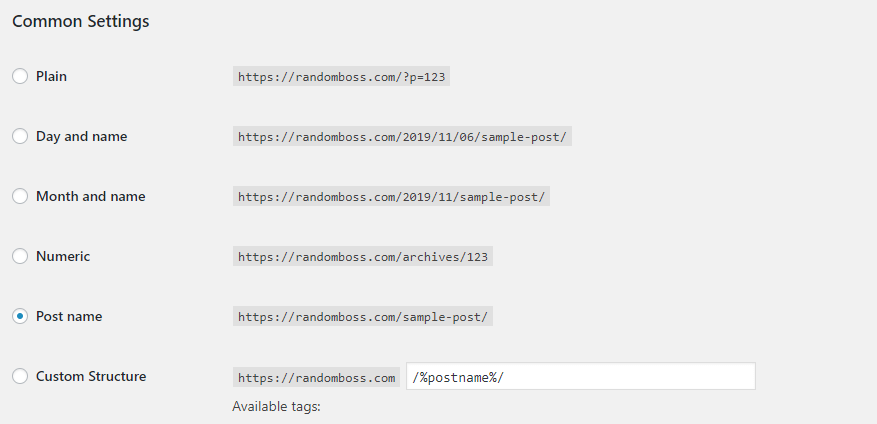
One example could be yourblog.com/parent-post is better than yourblog.com/2025/01/01/parent-post.
It makes your blog more user-friendly and with short URLs.
3. Install Theme and Plugins
It is very important to have a theme that readers can easily navigate within, and there a 1000s of themes and it can be hard to find the perfect one. There are free and paid themes.
The free theme is a good way to start, but if you have a budge and wanna be more unique, then go ahead with the paid version. The best-paid themes are StudioPress. They are always up-to-date and the developers take good care of them. One theme could cost you around $25-250.
Also, all free themes have a PRO version, if you like a specific theme, you can upgrade to the PRO version as well.
Plugins
Installing the right plugins is very important if you want your parenting blog to be very well optimized for ranking on Google.
- Rank Math: Most likely the greatest plugin for On-Page SEO.
- WP Fastest Cache: Cache cleaner, plus you get to minify CSS/JS.
- Grow by Mediavine: Sharing buttons.
- Block Bad Queries (BBQ): Plugin that stops malware.
- WP Forms: Allows you to create a contact form.
- Autoptimize: Can speed up your blog.
- Self Hosted Google Fonts: Only enable it to host google fonts locally.
- WP-Optimize: This plugin cleans your database from old revisions, spam comments, etc.
- WP-Rocket: This is a paid plugin, and if you want to get it, you will avoid installing WP Fastest Cache, WP-Optimize, Autoptimize, Async JavaScript, CDN Provider, HeartBeat Control, and many more. WP-Rocket is for more serious bloggers, and you can get it here.
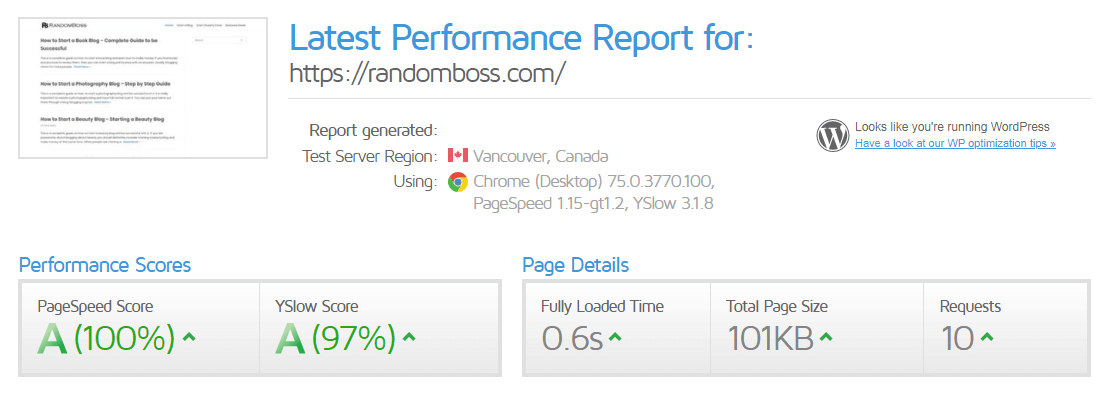
The WP-Rocket plugin is paid, all of the above are free. Also, most of the plugins have PRO versions, but the free versions work very well too.
Check my results on GTMetrix:
4. Adding Pages
It is important to have a couple of pages so people can know more about yourself and your blog.
You can add pages like:
- About Page: Show who are you and what are you doing, share your social media accounts so people can follow you there.
- Contact Page: Once you get more popular, people will wanna start doing business with you (collaboration, sponsored content, guest posts) and that’s why it is great to have a contact page.
- Copyright Page: If you value your content, I highly recommend having a page where you explain that your content is only yours and it is not available to copy unless you give permission. You can also install the WP Content Copy Protection plugin to disable the right-click.
These are some of the most important pages when you are first starting a WordPress blog, you can later add Privacy Policy and Terms of Service once you start using ads. (they will give you Privacy Policy page)
5. Writing your first post
The most important thing you should know is that you should NEVER copy someone else’s content! It is illegal and immoral, Google can penalize your blog and you will not be able to rank on the search engine.
It is important to be yourself, do some work in creating powerful headlines and great content as well. You need to have great headlines that can get more clicks, don’t make them clickbaity tho, because it can result in high bounce rates. You can check your headline scores here.
It is very important to not steal other people’s images, they may be copyrighted. That’s why you should use free-royalty photos, check Unsplash, and Pixabay.
For more blog ideas on what content you should write, check SEMRush, it is one of the best tools for bloggers. It will find you more keywords with low competition which you can rank pretty well easily.
How should to grow your audience?
Quantity over quality: Focus on quality content that your audience will engage in. Write to them, not for Google algorithms. Be consistent with uploads and very soon you will see traction of visitors coming in.
Collaboration: It is important to engage with other parenting bloggers, comment on their posts, and shout them out on your social media. You can later do a guest post for them so they will give you a free backlink from their blog, and they get unique content from you.
Communication with the audience: It is very important to learn from your mistakes and grow. Allow constructive criticism because it is one of the best ways to grow. Reply to comments and engage with them on social media.
Schedule when you gonna post on your blog on a weekly base and stick with it, and after a while, you will visitors popping.
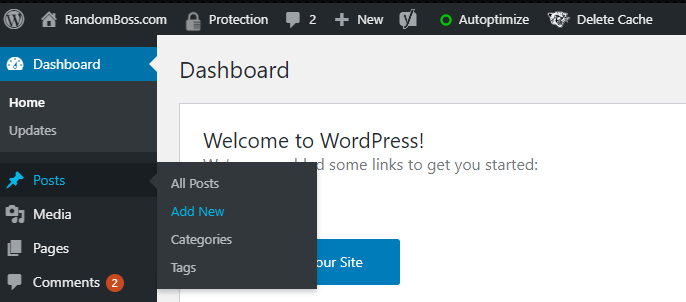
To write your first post, point at Posts at the left side of the dashboard and click Add New.
After you finished a blog post, you need to add a category.
To add a new category, click on +Add New Category, and it is automatically ticked so hit the Publish.
Note: Only do it for those who don’t have a target category.
Another tip I could give you is to install the Classic Editor plugin for the easier writing experience.
Congrats on learning How to Start a Parenting Blog successfully!
6. Monetizing
How can you monetize your blog once you have content up? You can make money with Affiliate Marketing (Amazon, ShareASale, CJ, etc), Display Ads (Google Adsense, Ezoic, MediaVine, Adthive), selling digital and physical products, membership products, and many more.
Do you use some great gadgets for your baby? You can grab an affiliate link from Amazon and they will give you a credit for the commission if someone purchases using your link. That’s why affiliate marketing works so great with no extra cost at the buyer.
Display ads are also great, I’ve seen bloggers make $40 per 1000 visitors. If you manage to get 50,000 monthly visits, that could be around $2,000 earnings for you only from ads.
Write consistently content, focus on promoting on your favorite social media as well. Google will start pushing your content for low competition keywords if you have good posts, and to hunt low-comp keywords, check SEMRush, it is the best tool for bloggers.
How to get more traffic?
Everyone knows about Pinterest these days, but not Tailwind. Tailwind will be able to help you get more traffic on your blog by automating everything about Pinterest.
First, about Pinterest. It is a search engine like Google and it is the best to attract traffic on your blog. It works like when you create all your blog content, and post everything, you just have to make a pin on Pinterest so that the people will see you. It is all about the visuals.
You share that on the boards and on some group boards where there are specific people, talking, and thinking about the same topic and niche on which you write.
Now, I will show you about the Tailwind that how it works, and how you can take benefits from it. It is an amazing website that allows you to attract all the traffic and makes your blog promotion much easier than you ever thought.
It becomes tough for the bloggers to use Pinterest because you have to make many pins of every type and you have to be consistent. Most of the time you will be posting different pins on Pinterest.
Tailwind is here for you. You just have to make pins and upload them to the tailwind. It will make a schedule and post all the pins on Instagram and Pinterest so you can give all your time to your content and blogging.
The promotion will be done automatically. It also knows about the timings of the followers and subscribers so it posts your pins when there are more followers.
Building relationships with your readers
Till now, you have made your blog, you are making very great content and you have enough traffic. Now, the next step is to create a healthy and everlasting relationship with your followers.
The blog you have is a parenting blog and it has many topics that people want to discuss but, not on an open platform. So, you have to provide them a platform which is by making ”Email List”.
It will be best when you will be helping them and sorting out their problems personally. You can use following email providers to keep a track of your followers and to interact with your followers:
- GetResponse
- ConvertKit
- MailerLite
- Aweber
- MailChimp
These all have very good and affordable plans for you. So, you can contact them and these all are so user-friendly.
You can promote your content on the best social media platforms like Facebook, YouTube, and Instagram. They are different, but for your blog, you can choose one and focus on growing that one.
- If you like filming yourself and doing vlogs, then Youtube can be the best.
- If you wanna post photos and short videos that will be engaging, Instagram may be most suitable for you.
- Facebook is a great way to post photos, videos, gifs, short paragraphs, and get more personal with your followers.
Note: Instagram most likely has the highest audience engagement, YouTube is awesome for informative content, and Facebook is perfect to get more personal with followers.
How to Start a Parenting Blog – Conclusion
- Pick the domain name
- Get Hosting (BlueHost)
- Install WordPress
- Install Theme and Plugins
- Add a few pages
- Add your first blog post
- Start Monetizing
- Congrats!
Well, this is everything that is required to make a successful blog. I know that it is long but making a blog is the same as starting a new business.
You have to make investments (VERY SMALL), and attract readers to your blog. Consistency and patience is the key to success in this field.
Now it is the perfect time to start a parenting blog. Do not think negatively about anything and give yourself a shot. What do you have to lose? You can start working and reap the benefits later.
I know you have the potential to make a living with your blog and the knowledge you have.
Produce original content and you will start seeing results soon. Blogging is a great method for any beginner to make money online.
If this was helpful, please share it on your favorite social media down below, and for more tips on blogging, click here.